
Pool Opening Guide: Complete Spring Startup Checklist 2026
Quick Answer
Pool opening involves removing winter covers, inspecting equipment, reconnecting plumbing, and balancing water chemistry. Start with equipment inspection, fill and reconnect systems, then shock and balance chemicals before swimming.
Quick Overview - Pool Opening Essentials
Opening your pool for spring requires systematic approach covering equipment inspection, plumbing reconnection, water chemistry balancing, and safety checks. The process typically takes 3-7 days depending on winter condition and pool type. Key steps include removing covers, inspecting equipment, filling to proper levels, reconnecting plumbing, starting circulation, testing and balancing water chemistry, and shocking the pool.
Pre-Opening Inspection and Preparation
Equipment Safety Check
Before touching any pool equipment, ensure all electrical connections have been safely disconnected during winter closure. Never assume equipment is safe - always verify power is off at the breaker before beginning work.
Inspect your pool pump, filter, heater, and any automation systems for visible damage. Look for cracks in equipment housings, damaged electrical connections, or signs of freeze damage. Learn how to identify pump problems early in the season.
Cover Removal and Cleaning
If using a winter cover, carefully remove accumulated debris and standing water before lifting the cover off. Use a cover pump or siphon to remove water - never drain dirty cover water into your pool. Clean and inspect the cover for damage before storing it properly for next season.
For pools that remained uncovered, expect more extensive cleaning and potentially more chemical treatments to achieve water clarity.
Pool Structure Inspection
Examine your pool structure for winter damage including cracks in concrete, loose tiles, or damage to vinyl liners. Above ground pool liners typically last 6-10 years and may need replacement if showing signs of deterioration.
Check skimmer and return fittings for cracks or looseness. Inspect pool lighting for water intrusion or damage. Address any structural issues before proceeding with water chemistry.
Water Level and Plumbing Reconnection
Filling to Proper Levels
Fill your pool to the proper operating level - typically halfway up the skimmer opening. This may take several hours depending on your water source and pool size. While filling, you can begin reconnecting equipment and inspecting plumbing.
If your pool has been completely drained, fill slowly to prevent hydrostatic pressure issues with vinyl liners or potential ground shift problems. Never leave a vinyl liner pool empty for extended periods.
Plumbing System Reconnection
Reconnect any plumbing that was disconnected for winter including:
- Skimmer connections and drain plugs
- Return jet fittings and eyeball directors
- Main drain connections (if applicable)
- Pool heater plumbing connections
- Salt cell connections for saltwater systems
- Automatic cleaner lines
Remove winterizing plugs and reinstall drain plugs with new gaskets or O-rings if needed. Apply pool-safe lubricant to O-rings during installation.
Equipment Startup Sequence
Follow proper startup sequence to prevent equipment damage:
- Ensure all drain plugs are installed and connections secure
- Prime the pump according to manufacturer instructions
- Start circulation system and check for leaks
- Verify proper flow at returns and skimmer suction
- Check pressure gauge readings on filter system
Filter System Maintenance and Startup
Sand Filter Maintenance
If you have a sand filter, perform a thorough backwash before starting normal operation. The type of filter sand matters for optimal filtration, and sand should be replaced every 3-5 years.
Check multiport valve operation and ensure it moves smoothly between positions. Replace valve gaskets if you notice any leakage or difficulty operating the valve.
Cartridge Filter Care
For cartridge filters, remove and inspect all filter cartridges. Cartridge filters typically need replacement every 1-2 years depending on usage and maintenance.
Clean cartridges with filter cleaner or replace if showing signs of permanent staining or damage. Remember that cartridge filters cannot be backwashed - they must be physically cleaned or replaced.
DE Filter Preparation
Diatomaceous Earth (DE) filters require special attention during startup. DE filters need regular backwashing and fresh DE powder after cleaning.
Inspect filter grids for damage and clean thoroughly before adding fresh DE powder. DE filter grids typically last 5-10 years with proper maintenance.
Water Chemistry Testing and Balancing
Initial Water Testing
Once circulation is established, test your water chemistry using a reliable test kit. Taylor K-2006 or TF-100 test kits provide more accurate results than test strips for opening procedures.
Test for:
- Free Chlorine (FCFree Chlorine — The chlorine actively sanitizing your water right now. This is the number you keep an eye on. how much you need →)
- Combined Chlorine (CCCombined Chlorine — "Used-up" chlorine left over from doing its job. Above about 0.5 ppm is the classic sign water needs a shock. learn more →)
- pH levels
- Total Alkalinity (TATotal Alkalinity — The buffer that keeps your pH from bouncing around. Get this in range and pH gets a lot easier to manage. learn more →)
- Calcium Hardness (CH)
- Cyanuric Acid (CYACyanuric Acid (stabilizer) — Sunscreen for your chlorine — it keeps sunlight from burning it off. The catch: the more you have, the more chlorine you need to keep. learn more →)
Don't be surprised if initial readings are completely out of range - this is normal after winter closure.
pH and Alkalinity Adjustment
Start by adjusting Total Alkalinity first, as this affects pH stability. Use sodium bicarbonate (baking soda) to increase alkalinity - target 60-80 ppm for saltwater pools, 80-120 ppm for traditional chlorine pools.
Once alkalinity is balanced, adjust pH to the optimal range of 7.4-7.6. Use sodium carbonate (soda ash) to raise pH or muriatic acid to lower it.
Stabilizer (CYA) Considerations
Cyanuric acid protects chlorine from UV degradation and is essential for outdoor pools. Saltwater pools absolutely need cyanuric acid to protect generated chlorine.
Target CYA levels:
- 30-50 ppm for traditional chlorine pools
- 70-80 ppm for saltwater generator systems
Salt pools require stabilizer just like traditional chlorine pools, despite some confusion about this requirement.
Chlorination and Shocking Process
Initial Chlorination
After balancing pH and alkalinity, establish proper chlorine levels. Use liquid chlorine (sodium hypochlorite) rather than granular products during startup for more controlled dosing.
Free chlorine targets depend on CYA levels - consult the FC/CYA relationship for proper ratios. Generally:
- 4-6 ppm FC for CYA 30-50 ppm
- 6-8 ppm FC for CYA 60-80 ppm
Shock Treatment Protocol
Most pools benefit from shock treatment during opening. Shocking frequency depends on pool conditions, but opening typically requires treatment.
You can shock pools on consecutive days if needed to achieve proper chlorine levels. However, high pH reduces shock effectiveness, so balance pH first.
SLAM Process for Problem Water
If opening reveals green or cloudy water, implement SLAMShock Level And Maintain — raise free chlorine to a target based on your CYA and hold it there until the algae is gone. It's a process, not a one-time dose. the SLAM walkthrough → (Shock Level And Maintain) process:
- Determine shock level based on current CYA
- Add liquid chlorine to reach shock level
- Maintain shock level 24/7 until water clears
- Test FC every few hours and add chlorine as needed
- Continue until overnight FC loss is minimal (under 1 ppm) and combined chlorine (CC) is 0.5 ppm or less
Green pool water poses health risks, so don't swim until water is properly balanced and clear.
Equipment-Specific Startup Procedures
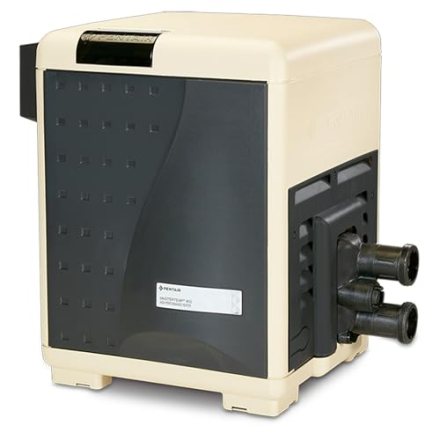
Pool Heater Activation
Pool heaters require careful startup after winter shutdown. Pool heaters are built to handle moisture but need protection from direct water exposure.
For gas heaters:
- Check gas connections for leaks using soapy water
- Inspect venting system for obstructions
- Verify proper combustion air flow
- Test safety controls and ignition system
Solar pool heaters work differently and may need different startup procedures including checking collectors and flow sensors.
Saltwater System Startup
Salt chlorine generators need special attention during startup:
- Verify proper salt levels (typically 2700-3400 ppm)
- Clean salt cell of calcium buildup
- Check cell condition and amperage draw
- Verify proper CYA levels for system protection
Understanding how salt cells work through electrolysis helps with proper startup and maintenance.
Salt water pools still require chemical balancing beyond just salt content.
Variable Speed Pump Setup
Variable speed pumps offer significant energy savings and may require programming after winter shutdown.
If experiencing issues, learn how to reset Pentair variable speed pumps and other common brands.
Pool pumps don't need 24/7 operation - program for 8-12 hours daily depending on pool size and conditions.
Cleaning and Debris Removal
Manual Cleaning Process
After establishing circulation and basic water chemistry, begin thorough cleaning:
- Skim surface debris thoroughly
- Brush walls, steps, and floor systematically
- Vacuum debris to waste if possible (sand or DE filters only; with a cartridge filter, vacuum through the filter and clean the element afterward)
- Clean skimmer and pump baskets
Pool skimmers work effectively when properly maintained and are crucial during opening cleanup.
Automatic Cleaner Setup
Once basic cleaning is complete, reconnect automatic pool cleaners. Most modern pool vacuums can run continuously during the opening process to help with debris removal.
Pool vacuum options include manual, automatic, and robotic models - choose based on your pool type and cleaning needs.
Filter Maintenance During Cleaning
Expect frequent filter cleaning during the opening process as accumulated debris loads the system. Clean or backwash filters more frequently than normal until water clarity improves.
Sand filters can be chemically cleaned if standard backwashing isn't sufficient for startup cleanup.
Troubleshooting Common Opening Issues
Equipment Problems
Pump Won't Prime:
- Check all suction-side connections for air leaks
- Verify drain plugs are installed with good gaskets
- Ensure adequate water level in skimmer
- Replace pump lid O-ring if cracked or dried
Low Pressure/Poor Flow:
- Clean skimmer and pump baskets
- Backwash or clean filter system
- Check for closed or partially closed valves
- Inspect for suction line obstructions
High Pressure Reading:
- Clean or replace filter elements
- Check for return line restrictions
- Verify proper valve positions
Water Chemistry Problems
Cloudy Water:
- Test and balance all chemical parameters
- Increase filtration time temporarily
- Consider flocculent for persistent cloudiness
- Ensure adequate circulation to all pool areas
Green Water:
- Implement SLAM process immediately
- Brush pool surfaces frequently
- Run filter system continuously
- Test FC levels every few hours
High Combined Chlorine:
- Shock with liquid chlorine to break chloramines
- Ensure proper pH levels for effective shocking
- Increase circulation and aeration if possible
Algae Prevention and Treatment
Pool covers help prevent algae during closure, but opening may still reveal algae growth.
Most pools don't need algaecide if chlorine levels are properly maintained, but severe algae blooms may benefit from treatment.
Pool algae can cause health issues, so address algae problems before allowing swimming.
Safety Considerations and Final Steps
Water Quality Verification
Before declaring your pool ready for swimming, verify:
- Free chlorine below 10 ppm (per CDC) and appropriate for your CYA
- pH between 7.4-7.6
- Water clarity allows visibility of main drain
- No combined chlorine issues
- All equipment operating properly
Improper chlorine levels can cause health issues, so accurate testing is essential.
Equipment Safety Checks
Perform final safety verification:
- All electrical connections properly secured
- GFCI outlets functioning correctly
- Pool equipment properly grounded
- No exposed wiring or damaged connections
- Proper water levels in all equipment
Documentation and Maintenance Schedule
Record your opening date, chemical additions, and equipment settings for future reference. Establish regular maintenance schedule including:
- Daily visual inspection
- Weekly chemical testing
- Monthly equipment inspection
- Seasonal professional service
Regional and Climate Considerations
Freeze Zone Considerations
Winterization requirements depend on climate zone, and opening procedures vary accordingly.
Properly winterized pools can stay closed 6-8 months safely, but longer closures may require additional opening steps.
Year-Round Pool Regions
In warmer climates like Las Vegas, pools often operate year-round, requiring different maintenance approaches than seasonal opening procedures.
Winter pump operation varies by region and affects spring startup procedures.
When to Call a Professional
Electrical Issues
Contact professional service for:
- GFCI outlets that won't reset
- Equipment that trips breakers repeatedly
- Any signs of electrical damage or corrosion
- Automation system problems
Equipment Repairs
Professional service recommended for:
- Pool heater repairs or gas line issues
- Major plumbing leaks or pipe damage
- Pump motor replacement or rewiring
- Salt cell replacement or control system issues
Structural Problems
Contact specialists for:
- Significant cracks in pool structure
- Liner replacement needs
- Tile or coping repairs
- Deck or surrounding area damage
Maintenance Timeline and Scheduling
Opening Week Schedule
Day 1-2: Equipment inspection, cover removal, plumbing reconnection
Day 3-4: Water filling, circulation startup, initial cleaning
Day 5-7: Chemical balancing, shock treatment, fine-tuning
Week 2: Monitor water quality, adjust chemical levels, establish routine maintenance
Chemical Addition Timeline
Pool chemicals need 2-8 hours to circulate and settle, so plan chemical additions with adequate time between adjustments.
Check chemical shelf life before opening - some products may have degraded during storage.
Frequently Asked Questions
How long does pool opening take?
Complete pool opening typically requires 3-7 days depending on winter condition, equipment needs, and water chemistry balancing requirements. Simple openings may be completed in 1-2 days, while problematic water conditions may require a week or more.
Can I swim immediately after opening?
No, wait until water chemistry is properly balanced and water is clear. This typically takes 24-48 hours minimum after completing chemical adjustments and achieving proper chlorine levels.
Should I shock before or after opening equipment?
Always establish circulation and balance basic chemistry (pH and alkalinity) before shocking. Shocking timing is crucial - shock after equipment is running properly.
What if my pool is completely green?
Green pools require SLAM treatment and should never be used until completely clear. This process may take several days to over a week depending on severity. Professional help may be needed for severe cases.
Do I need to replace pool chemicals each season?
Not necessarily - many properly stored dry chemicals keep for a long time. However, liquid chlorine degrades quickly—roughly 20% per month at room temperature—so buy it fresh and use it up. Test chemical effectiveness if storage conditions were poor.
How do I know if equipment was damaged over winter?
Look for cracks in equipment housings, damaged gaskets, signs of freezing, or equipment that won't operate properly. Professional inspection recommended if unsure about equipment condition.
Related Pool Maintenance Guides
For comprehensive pool care beyond opening procedures, explore these detailed guides:
- Understanding how different filter types work helps optimize your filtration system
- Above ground pool installation guidance for new pool owners
- DIY pool installation tips and safety considerations
- Pool safety and hygiene guidelines for all swimmers
For the full breakdown of safe chlorine levels by CYA level, see our pool water chemistry guide.
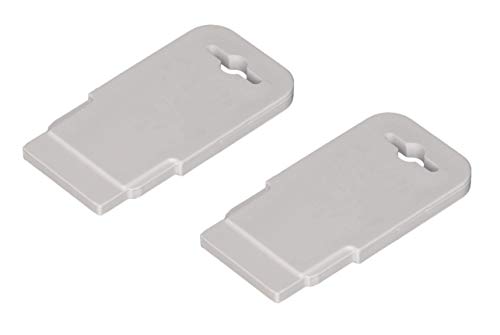
 Pool Safety Cover Hex Key Tool (2-Pack)
Hex keys to install or remove a pool safety cover. View on Amazon →
Pool Safety Cover Hex Key Tool (2-Pack)
Hex keys to install or remove a pool safety cover. View on Amazon →
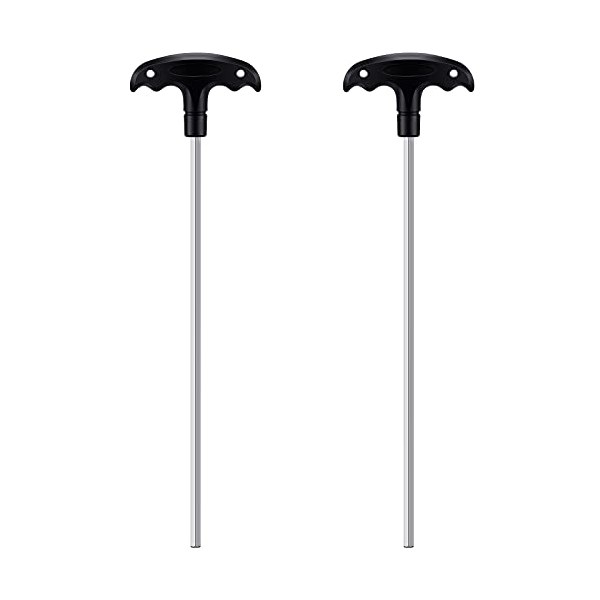
 Pool Eyeball / Return Jet Fitting Removal Tool (ATIE)
Pops out & reseats Hayward SP1419 return-jet eyeballs — handy for closing. View on Amazon →
Pool Eyeball / Return Jet Fitting Removal Tool (ATIE)
Pops out & reseats Hayward SP1419 return-jet eyeballs — handy for closing. View on Amazon →
Still need help? Ask a Pool & Spa Expert AD
Get a personalized answer from PoolGuy810 — 30 years owning a pool and spa repair company. Describe your issue and get step-by-step help.
Related Pool Guides
Need More Help?
Try our free pool calculators and tools to help diagnose and fix your pool problems.
Browse Pool ToolsSLAM calculator, pH calculator, salt dosing & more