Pool Heater Outdoor Installation Guide - Placement Tips

Installing a pool heater outdoors - best practices?
Read full question
Somewhere between watching five different YouTube tutorials on gas pool heater placement, I managed to confuse myself even more about proper outdoor installation. The area near my equipment pad gets decent airflow but is somewhat exposed to weather. I've got the electrical and gas connections sorted, but want to make sure I'm following best practices for outdoor heater installation. Should I be concerned about rain exposure, or do most pool heaters handle outdoor conditions just fine? Any specific clearance requirements I should know about?
Quick Answer
Yes, pool heaters are designed for outdoor installation and perform best with proper clearances and ventilation. Follow manufacturer specifications for placement distances and consider weather protection.
Outdoor Installation Requirements
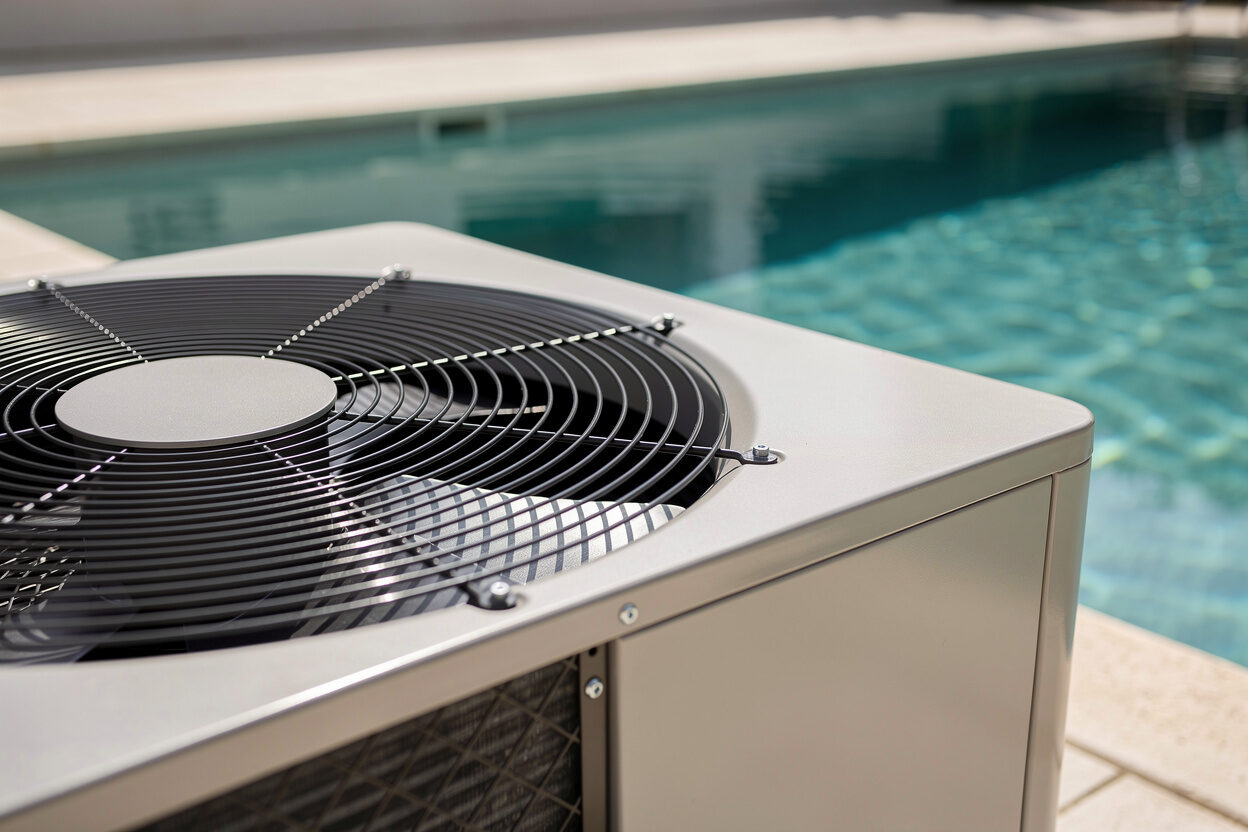
The clearance and combustion-air rules below are for gas heaters (natural gas or propane), which burn fuel and vent hot exhaust. Heat pumps need open airflow around the evaporator but have no combustion exhaust or fire-clearance concern, and solar systems have neither - so with those, follow the airflow and weather-protection steps and skip the exhaust/combustible-clearance specifics. For a gas heater, the first thing the pros check is the manufacturer-specified clearances: service access at the front, open space above the exhaust, and minimum side/back distances that grow larger next to anything combustible.
Step 1: Check Clearance Requirements
Minimum clearances are critical for safety and efficiency:
- Front: maintain the manufacturer-specified service clearance — typically enough room to pull off the front door panel for service (often around 24–36 inches); check your manual
- Sides and back: commonly 6-12 inches, but it depends on the surface - combustible materials (wood, vinyl siding) require more than non-combustible ones (masonry, concrete). Check the rating plate; do not assume a single number.
- Above the exhaust - the fire-critical one: never install a gas heater under a deck, soffit, eave, or other combustible overhang. Manufacturers such as Pentair (MasterTemp) and Hayward prohibit installation beneath an enclosed or overhanging structure within a defined vertical zone, and the required clearance to a combustible overhang is larger than the open-air clearance above. When in doubt, leave the top of the exhaust open to the sky.
- Position the unit away from building air-intake vents per the manufacturer and local code (commonly around 4 feet horizontally, more in some jurisdictions), so exhaust is not drawn indoors
- Verify the unit's amperage rating matches your electrical service
These clearances prevent heat buildup, ensure proper combustion air flow, and meet safety codes. Consult your owner's manual for model-specific requirements, as some units may need greater distances.
Step 2: Evaluate Weather Protection Needs
While pool heaters withstand outdoor conditions, strategic placement improves longevity:
- Position away from prevailing winds that can affect pilot lights and efficiency
- Consider a simple roof or overhang to reduce direct rain exposure on control panels
- Avoid low-lying areas where water might pool during heavy rains
- Keep clear of sprinkler systems and landscape irrigation
Most heaters feature weather-resistant cabinets and components, but minimizing moisture exposure to electronic controls extends equipment life.
Step 3: Plan Your Equipment Pad Layout
Organize your equipment for maximum efficiency:
- Place the heater downstream from your filter system in the plumbing circuit
- Position close enough to minimize long pipe runs but respect clearances
- Ensure the pad is level and provides stable support
- Plan for easy access to gas shutoff valves and electrical disconnects
- Consider future maintenance needs when finalizing placement
I recommend installing a dedicated gas shutoff valve at the distance required by local codes (commonly within 5 feet of the heater) if your gas line doesn't already have one nearby.
Step 4: Address Ventilation and Air Flow
Proper combustion air flow is essential for gas heaters:
- Avoid enclosed areas or tight corners that restrict air movement
- Don't box in the heater with decorative screening that blocks airflow
- Keep vegetation trimmed back to maintain clearances
- Position away from outdoor kitchen exhaust fans or similar equipment
Poor ventilation can cause incomplete combustion, reduced efficiency, and safety issues. Your heater needs abundant fresh air for optimal operation.
Common Installation Mistakes to Avoid
Several placement errors can compromise performance:
- Tucking the exhaust tight against a wall or overhang, so combustion gases recirculate back into the heater's own air intake instead of dispersing
- Placing under deck overhangs without adequate clearances
- Positioning where landscaping will eventually grow into clearance zones
- Ignoring prevailing wind patterns that affect combustion efficiency
Many pool owners also underestimate future service needs. Your technician will need comfortable access to components, so plan accordingly during installation.
Protecting Your Investment
Once properly installed outdoors, simple maintenance protects your heater:
- Schedule annual professional inspections before each heating season
- Keep the area around the unit free of debris and vegetation
- Monitor for signs of corrosion on gas connections
- Clean heat exchanger according to manufacturer recommendations
Understanding proper water chemistry balance also prevents premature heat exchanger damage from corrosive conditions. Outdoor installation actually helps with this, as better ventilation reduces humidity around the unit.
Your outdoor heater installation will provide years of reliable service when positioned correctly with adequate clearances and airflow. Take time to get the placement right initially rather than relocating equipment later.
Still need help? Ask a Pool & Spa Expert AD
Get a personalized answer from PoolGuy810 — 30 years owning a pool and spa repair company. Describe your issue and get step-by-step help.
Related Pool Guides
Need More Help?
Try our free pool calculators and tools to help diagnose and fix your pool problems.
Browse Pool ToolsSLAM calculator, pH calculator, salt dosing & more