How to Install Above Ground Pool Liner Yourself - DIY Guide

Can I tackle above ground pool liner installation myself?
Read full question
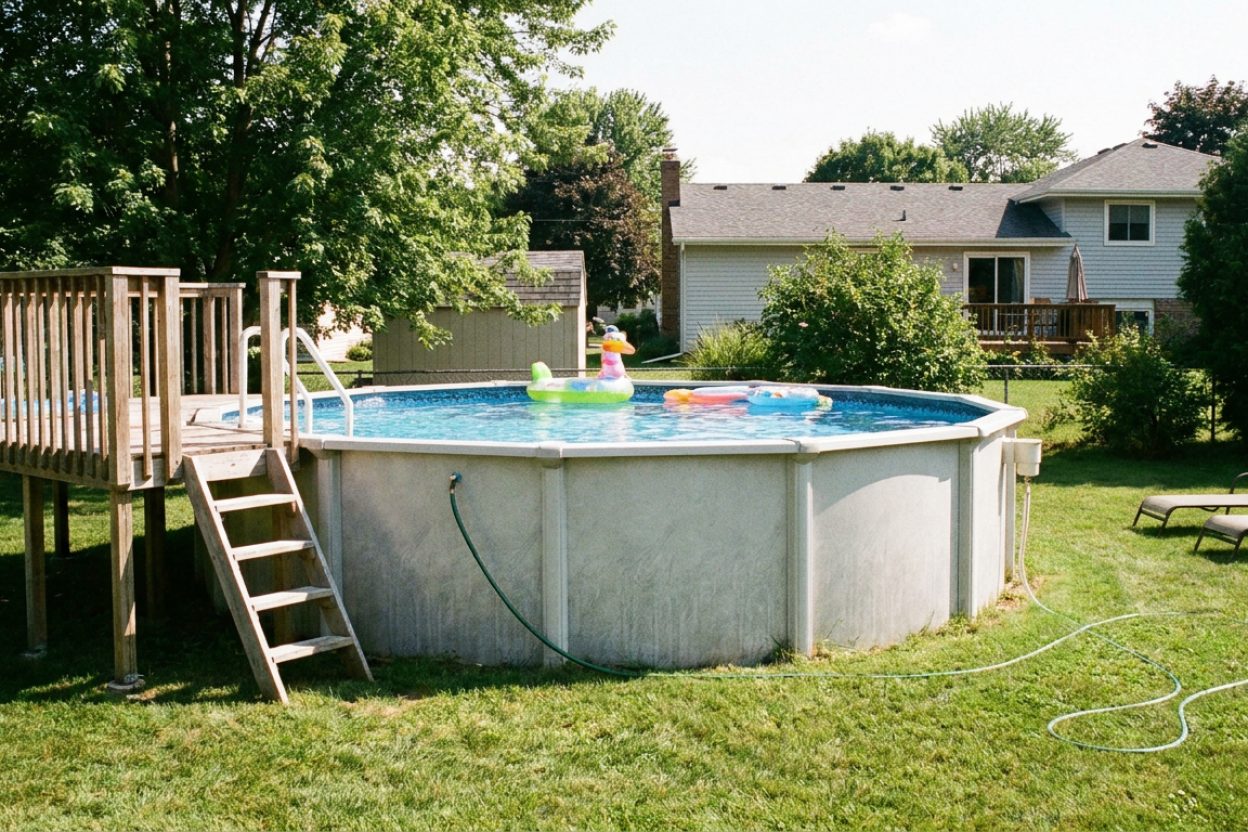
Halfway through every spring pool prep, I'm staring at the same mysterious liner shrinkage and random tears that definitely weren't there last fall. I'm reasonably handy and have helped friends with home projects before, but I've never attempted anything like this.
Before I dive in headfirst, is this actually something a determined DIYer can handle? I'm wondering about the time commitment and whether I'll need to recruit some buddies to help out. I'd rather know what I'm getting into upfront than end up with a half-installed liner and a flooded backyard!
Quick Answer
Yes, you can install an above ground pool liner yourself with the right tools and patience. The process typically takes 4-6 hours and requires 2-3 people for best results.
Step-by-Step Installation Process
- Prepare the pool bottom
Remove all water and debris from the pool. Check the bottom for rocks, sticks, or sharp objects that could puncture the liner. Add a thin layer of sand or use pool padding to create a smooth surface. The bottom must be completely level - use a rake to smooth out any depressions or high spots. - Install the liner track or coping strips
Remove the old coping strips around the pool wall's top edge. Clean the wall thoroughly and install new coping strips if needed. These hold the liner in place, so ensure they're securely fastened with stainless steel screws every 6-8 inches. - Position the new liner
Unfold the liner in a sunny area for 30-60 minutes to make it more pliable. Identify the deep end (usually marked) and position it correctly. Drape the liner over the pool walls, ensuring equal overhang on all sides - typically 6-8 inches beyond the wall top. - Secure the liner to the wall
Starting at one end, hook the liner bead into the track or under the coping strips. Work your way around the pool, pulling the liner taut but not overstretched. Have helpers hold sections while you work to prevent the liner from slipping back into the pool. - Remove air and wrinkles
Use a shop vacuum to create suction between the liner and wall. WARNING: Ensure vacuum is rated for wet use and all electrical connections are protected by GFCI outlets to prevent electrical shock. Place the vacuum hose under the liner at the shallow end and seal the opening with your hands. Run the vacuum for 5-10 minutes while smoothing out wrinkles by hand, working from the center outward. - Begin filling with water
Start adding water slowly with a garden hose. As water enters, the vacuum suction helps the liner conform to the pool bottom. Continue smoothing wrinkles - they become impossible to remove once water pressure increases. Keep the vacuum running until the water covers the floor by about 6 inches and the liner is fully set against the walls; only then turn it off. - Adjust and trim excess liner
With 6-12 inches of water in the pool, make final adjustments to eliminate major wrinkles. The water weight will hold the liner in place. Once you're satisfied with the fit, use a sharp utility knife to trim excess liner, leaving about 1-2 inches above the coping for final securing. - Install return fittings and skimmer (only as the water reaches them)
Do NOT cut the skimmer and return openings early - the vinyl is still stretching as the pool fills, and cutting too soon leaves misaligned, leaking fittings (and can buckle the wall). Wait until the liner is fully set and water has risen to just below each fitting. Then hold the faceplate with new gaskets over the spot, cut the liner out around the inside of the faceplate, and seal per the manufacturer's instructions. The skimmer sits highest, so it's usually the last one you cut as the pool nears operating level. - Complete the water fill
Continue filling the pool to normal operating level. Monitor for any developing wrinkles or stress points. Small wrinkles near steps or corners are normal and will often flatten out over time as the liner stretches. - Final cleanup and chemical balance
Remove installation tools and debris. Test water chemistry and adjust as needed. Fresh fill water chemistry varies by source, so test pH, alkalinity, and chlorine frequently during the first week and balance accordingly. Once the pool is filled and fittings are secure, you can begin balancing and sanitizing right away — do not leave a freshly filled pool without sanitizer, as that invites algae.
Essential Tools and Materials
- New pool liner (measured specifically for your pool)
- Shop vacuum (wet/dry type)
- Sharp utility knife with extra blades
- Screwdriver set
- Pool cove or foam padding
- Measuring tape
- Garden hose
- Pool-safe silicone sealant
- Replacement gaskets for fittings
- Knee pads for comfort
Critical Success Tips
Weather matters significantly. Install liners on warm, sunny days (75°F or higher) when the vinyl is most pliable. Cold weather makes liners stiff and prone to cracking during installation.
Get adequate help. This is not a solo job. You need at least 2-3 people to handle the liner properly and prevent it from falling back into the pool during installation.
Work systematically with wrinkles. Small wrinkles are acceptable, but large ones must be eliminated early in the process. Once significant water weight is in the pool, major adjustments become impossible.
Don't rush the process. Allow 4-6 hours for the complete installation. Hurrying leads to mistakes that could require starting over with a new liner.
When to Call a Professional
Consider professional installation if your pool has complex features like built-in steps, unusual shapes, or if you're uncomfortable with the physical demands. Professionals also carry insurance against damage and typically warranty their installation work.
If you discover structural issues with your pool wall or bottom during preparation, address these before attempting liner installation. A damaged pool structure will likely damage your new liner quickly.
Still need help? Ask a Pool & Spa Expert AD
Get a personalized answer from PoolGuy810 — 30 years owning a pool and spa repair company. Describe your issue and get step-by-step help.
Related Pool Guides
Need More Help?
Try our free pool calculators and tools to help diagnose and fix your pool problems.
Browse Pool ToolsSLAM calculator, pH calculator, salt dosing & more