How to Winterize Your Inground Pool: Complete Step Guide

What's the proper procedure for winterizing an inground pool?
Read full question
Planning to winterize my new inground pool using the same routine that worked perfectly on my old above-ground, but worried the chemical and equipment needs are completely different.
What are the specific steps I should follow for proper winterization? I'm particularly concerned about getting the water chemistry balanced correctly and protecting my filtration system and plumbing from freeze damage. Should I be targeting specific chemical levels, and what's the proper sequence for draining, cleaning, and applying winterizing treatments?
Quick Answer
Winterizing an inground pool involves balancing water chemistry, cleaning thoroughly, lowering water levels, adding winter chemicals, and protecting equipment from freezing temperatures. The process includes ensuring CYA levels are 30-50 ppm by adding cyanuric acid at a rate of 1 lb per 10,000 gallons (raises CYA by ~13 ppm). CYA should be pre-dissolved in a bucket of hot water or added using the SOCK method. CYA dissolves slowly, so retest after a few days or up to a week before adding more.
Step-by-Step Winterization Process
Phase 1: Water Chemistry Balance (1-2 weeks before closing)
- Test and balance pH: Adjust pH to 7.4-7.6 using muriatic acid (hydrochloric acid) to lower or sodium carbonate (soda ash) to raise. Use a reliable test kit like Taylor K-2006 for accurate readings.
- Adjust Total Alkalinity: Target 80-120 ppm for most pools. Add sodium bicarbonate if low, or muriatic acid if high (this will also lower pH).
- Set Calcium Hardness: Aim for 250-350 ppm for plaster or concrete pools. Add calcium chloride if too low. High calcium requires partial water replacement.
- Stabilizer levels: Ensure CYACyanuric Acid (stabilizer) — Sunscreen for your chlorine — it keeps sunlight from burning it off. The catch: the more you have, the more chlorine you need to keep. learn more → is 30-50 ppm. Add cyanuric acid if needed. Pre-dissolve the cyanuric acid in a bucket of hot water before adding it to the pool, or use the SOCK method (place the CYA in a sock or nylon and place it in the skimmer basket or hang it in front of a return, squeezing occasionally). CYA dissolves slowly, so retest after a few days or up to a week before adding more.
- Shock the pool: Add liquid chlorine to achieve 4-6 ppm free chlorine to provide initial sanitization for winter closure. For the free chlorine target for your CYA, use our all-in-one pool calculator.
Phase 2: Deep Cleaning (1 week before closing)
- Brush all surfaces: Scrub walls, steps, and floor thoroughly to remove biofilm and algae. Pay special attention to corners and crevices.
- Vacuum to waste: Remove all debris from pool bottom. (Vacuuming to waste needs a sand or DE filter with a multiport "waste" valve — cartridge filters have no waste setting, so with a cartridge you vacuum through the filter and then clean or replace it, or use a separate utility pump to send the water out of the pool.) Don't backwash the filter yet - you want maximum filtration during final cleaning.
- Clean waterline: Use pool tile cleaner to remove scum line and calcium deposits that can harbor bacteria over winter.
- Skim and net debris: Remove all floating leaves, insects, and organic matter that could decompose over winter.
- Run filter 24/7: Operate filtration continuously for 48-72 hours after cleaning to polish water clarity.
Phase 3: Equipment Preparation
- Backwash and clean filter: For sand filters, backwash thoroughly. For cartridge filters, remove and clean or replace cartridges. For DE filters, backwash and remove grids for cleaning.
- Lower water level: Reduce water level according to your cover type: typically 4-6 inches below skimmer opening for mesh covers, or 12-18 inches for solid covers. Always consult your specific cover manufacturer's specifications as requirements can vary significantly between brands and cover types. Use submersible pump if needed.
- Drain skimmer lines: Remove skimmer baskets and use shop vacuum or compressor to blow water from lines. Add RV antifreeze to skimmer if in freeze-prone area.
- Winterize return lines: Install return line plugs after blowing lines clear. Some systems require removing return fittings entirely.
- Drain main drain line: If possible, blow this line clear and plug. In some configurations, you'll leave this line flooded but add antifreeze.
Phase 4: Equipment Winterization
- Pump winterization: Remove drain plugs from pump housing and motor (if applicable). Store plugs in pump basket. Tilt pump to drain completely.
- Filter system: Remove drain plugs from filter tank and multiport valve. For cartridge systems, remove all cartridges and drain housing completely.
- Heater preparation: Turn off gas supply and electrical power. Remove drain plugs and follow manufacturer's winterization procedures. Some require professional service.
- Salt chlorine generators: Remove cell and store indoors, or follow manufacturer's winter procedures. Most require removing the flow sensor and storing it indoors with the cell.
- Automatic cleaners: Remove from pool, clean thoroughly, and store indoors. Drain all water from cleaner and hoses.
Phase 5: Winter Chemical Treatment
- Add winterizing chemicals: Use winter chemical kits sized for your pool, or add individually: algaecide (non-metallic polymer type), enzyme clarifier, and stain preventer.
- Final chlorine adjustment: Add liquid chlorine to achieve 4-6 ppm FCFree Chlorine — The chlorine actively sanitizing your water right now. This is the number you keep an eye on. how much you need →. This provides initial sanitization but won't last all winter. For the free chlorine target for your CYA, use our all-in-one pool calculator.
- Optional clarifier: Add polyaluminum chloride-based clarifier to help settle fine particles before cover installation.
- Circulate chemicals: Run pump for 2-4 hours to distribute all winterizing chemicals evenly throughout the pool.
Phase 6: Final Steps
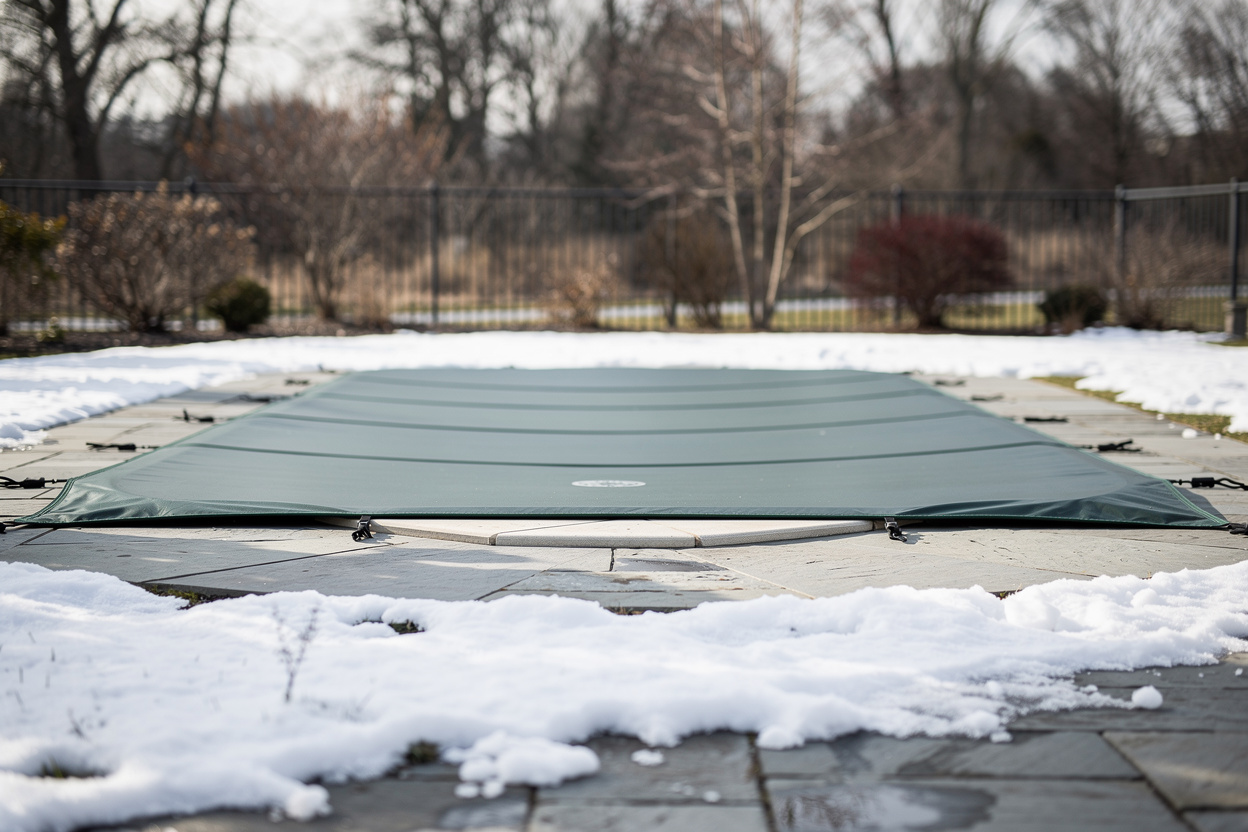
- Install winter cover: For safety covers, ensure all springs and straps are properly tensioned. For solid covers, ensure proper water bags or attachment method.
- Disconnect and store equipment: Remove pump, filter, and other equipment if recommended for your climate. Store in dry, protected area.
- Final equipment shutdown: Turn off all electrical circuits at breaker panel. Remove or protect any electronic controls from moisture.
- Document chemical levels: Record final test results for reference during spring opening.
Critical Timing and Climate Considerations
Timing is crucial: Begin this process 2-3 weeks before your first expected hard freeze. Rushing winterization often leads to incomplete chemical balancing or equipment damage.
Regional variations: Warmer climates may not require complete equipment removal, while extreme cold regions need additional antifreeze protection and equipment storage.
Common Winterization Mistakes to Avoid
- Closing with poor water chemistry - this leads to staining and algae problems
- Insufficient water removal from equipment - causes expensive freeze damage
- Dropping undissolved chlorine tablets or cal-hypo granules onto the pool surface - these can bleach it; pre-dissolve shock and use a floater for tablets
- Forgetting to remove cartridge filters - they can freeze and crack
- Improper cover installation - leads to debris accumulation and cover damage
Safety Warning: Always turn off electrical power before working on pool equipment. Use proper ventilation when adding chemicals, and never mix different chemical products. CRITICAL: Never completely drain an inground pool in freezing climates - hydrostatic pressure from groundwater can crack the pool shell and cause expensive structural damage.
For the full breakdown of safe chlorine levels by CYA level, see our pool water chemistry guide.
 Pool Safety Cover Hex Key Tool (2-Pack)
Hex keys to install or remove a pool safety cover. View on Amazon →
Pool Safety Cover Hex Key Tool (2-Pack)
Hex keys to install or remove a pool safety cover. View on Amazon →
 Pool Eyeball / Return Jet Fitting Removal Tool (ATIE)
Pops out & reseats Hayward SP1419 return-jet eyeballs — handy for closing. View on Amazon →
Pool Eyeball / Return Jet Fitting Removal Tool (ATIE)
Pops out & reseats Hayward SP1419 return-jet eyeballs — handy for closing. View on Amazon →
 Taylor K-2006C Complete FAS-DPD Pool & Spa Test Kit
The FAS-DPD kit pool pros trust — reads chlorine accurately even at shock/SLAM levels, plus pH, alkalinity, calcium hardness and CYA. View on Amazon →
Taylor K-2006C Complete FAS-DPD Pool & Spa Test Kit
The FAS-DPD kit pool pros trust — reads chlorine accurately even at shock/SLAM levels, plus pH, alkalinity, calcium hardness and CYA. View on Amazon →
 Superior Pump 91014 1/4 HP Submersible Utility Pump
Drains a pool, cover, or equipment pit when you need to lower the water. View on Amazon →
Superior Pump 91014 1/4 HP Submersible Utility Pump
Drains a pool, cover, or equipment pit when you need to lower the water. View on Amazon →
Still need help? Ask a Pool & Spa Expert AD
Get a personalized answer from PoolGuy810 — 30 years owning a pool and spa repair company. Describe your issue and get step-by-step help.
Related Pool Guides
Need More Help?
Try our free pool calculators and tools to help diagnose and fix your pool problems.
Browse Pool ToolsSLAM calculator, pH calculator, salt dosing & more