
How to Patch Pool Liners: Complete Step-by-Step Guide

What's the best way to patch holes in my vinyl pool liner?
Read full question
Staring at my pool liner that somehow went from a tiny tear to a massive gushing hole after following a YouTube patch tutorial. I've seen those vinyl patch kits at the pool store but honestly have no idea how they work or if they actually hold up.
The hole isn't huge - maybe about the size of a quarter - but I'm worried it's going to get bigger if I don't do something soon. Do I need to drain the whole pool to patch it properly, or can I somehow fix it with water still in there? Really hoping I don't have to deal with refilling and rebalancing all my chemicals again!
Quick Answer
Yes, pool liners can be patched using vinyl repair kits. Small holes and tears can be fixed underwater with adhesive patches, while larger damage may require draining and dry patching for best results.
Step-by-Step Pool Liner Patching Process
Method 1: Underwater Patching (Most Common)
- Locate the exact damage: Mark the tear or hole with a pool-safe marker or by placing a heavy object nearby as a reference point. This prevents losing the spot during repair.
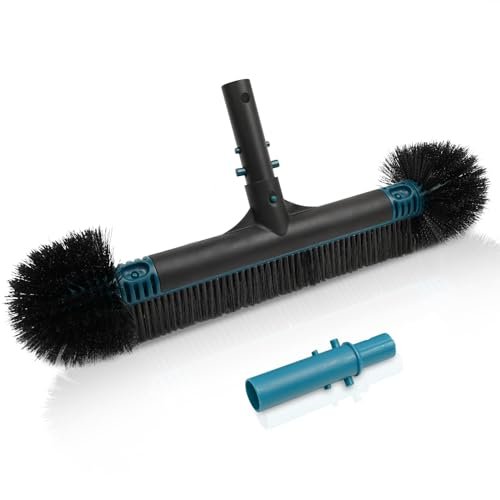
- Clean the damaged area: Use a pool brush to gently scrub around the tear, removing algae, dirt, and debris. The patch won't adhere properly to a dirty surface.
- Cut your patch material: From your vinyl repair kit, cut a patch that extends at least 1-2 inches beyond the damage on all sides. Round the corners to prevent peeling.
- Apply underwater adhesive: Squeeze the waterproof adhesive generously onto the patch. Most quality kits like Blue Devil or Boxer Adhesives work well underwater.
- Position and press the patch: Dive down and firmly press the patch over the damage, working from the center outward to eliminate air bubbles. Hold firmly for 30-60 seconds. Note: Only attempt underwater repairs if you're a confident swimmer and consider having someone nearby for safety.
- Apply additional adhesive around edges: Use extra adhesive around the patch perimeter for a watertight seal.
- Allow curing time: Keep the pool water level stable and avoid heavy swimming for 24-48 hours while the patch cures completely.
Method 2: Dry Patching (For Larger Damage)
- Lower water level: Lower the water until the damaged area sits 6-12 inches above the new waterline so it can dry. On a vinyl-liner pool, don't drain below mid-wall—a drained liner can shrink and slip out of its track. Safety Warning: Before draining, turn off power to all pool electrical equipment (lights, pumps, heaters) at the breaker to prevent electrical hazards when water levels drop.
- Clean and dry thoroughly: Scrub the area with mild detergent and let it dry completely. Any moisture will compromise the patch.
- Sand lightly: Use fine-grit sandpaper to roughen the area around the damage, creating better adhesion.
- Apply primer (if included): Some repair kits include primer - apply this first and let it dry according to package directions.
- Cut and apply patch: Cut your patch material 2-3 inches larger than the damage. Apply adhesive to both the liner and patch, then press firmly.
- Remove air bubbles: Use a roller or smooth tool to work out any trapped air, starting from the center.
- Seal edges: Apply additional adhesive around all edges and feather it out smoothly.
- Cure before refilling: Wait 24-48 hours before adding water back to ensure proper bonding.
Types of Damage You Can Patch
Easily Repairable:
- Small punctures from pool toys or debris (under 2 inches)
- Linear tears along seams or stress points
- Pin holes from sharp objects
- Minor wear spots before they become holes
More Challenging but Possible:
- Larger tears up to 6 inches (may need professional assessment)
- Corner damage near steps or ladders
- Multiple small holes in the same area
When Patching May Not Work
Consider liner replacement if you have:
- Extensive damage covering large areas
- Multiple patches that have failed previously
- Liner material that's severely degraded or brittle
- Damage along the top rail or coping area
- Tears longer than 8-10 inches
Essential Tools and Materials
For successful patching, you'll need:
- Vinyl repair kit with appropriate adhesive (Boxer, Blue Devil, or HH-66/RH Adhesives)
- Scissors for cutting patch material
- Pool brush for cleaning
- Fine sandpaper (for dry patches)
- Underwater marker or weights for marking
- Smooth roller or squeegee
Prevention Tips
Prevent future liner damage by:
- Maintaining proper water chemistry (pH 7.2-7.8, alkalinity 80-120 ppm)
- Removing sharp objects and debris promptly
- Using pool ladders and equipment properly
- Avoiding dragging heavy objects across the liner
- Inspecting regularly for early signs of wear
Professional vs. DIY Repair
Most homeowners can successfully patch small to medium liner damage. However, consider calling a professional for tears larger than 6 inches, multiple failure points, or if you're uncomfortable working underwater. Professional repairs typically cost $150-400 but may provide longer-lasting results for complex damage.
Safety Note: Always ensure proper pool chemistry balance after repairs. Test and adjust chlorine, pH, and alkalinity levels since some adhesives can temporarily affect water chemistry.
For the full breakdown of safe chlorine levels by CYACyanuric Acid (stabilizer) — Sunscreen for your chlorine — it keeps sunlight from burning it off. The catch: the more you have, the more chlorine you need to keep. learn more → level, see our pool water chemistry guide.
Still need help? Ask a Pool & Spa Expert AD
Get a personalized answer from PoolGuy810 — 30 years owning a pool and spa repair company. Describe your issue and get step-by-step help.
Related Pool Guides
Need More Help?
Try our free pool calculators and tools to help diagnose and fix your pool problems.
Browse Pool ToolsSLAM calculator, pH calculator, salt dosing & more