
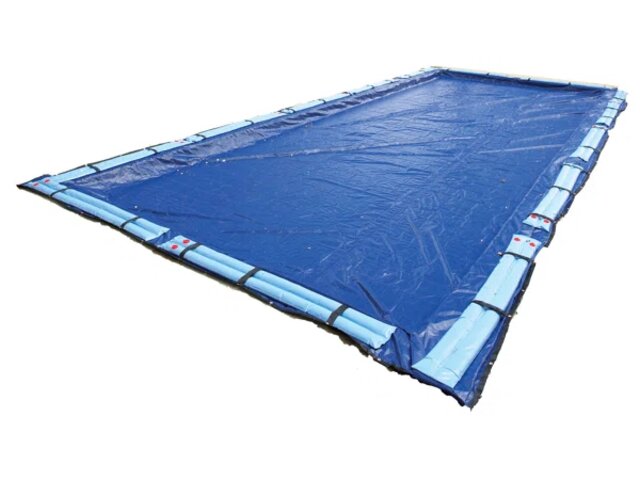
Do You Need a Pool Cover Pump? Winter Pool Guide

Should I get a pump to drain water off my winter pool cover?
Read full question
Already dropped serious cash on winter prep, but before I skip the pool cover pump: I've had my 18x36 inground pool for about 4 years now. This is my second winter with the safety cover, and I'm noticing that after heavy rains and snowmelt, there's quite a bit of standing water pooling on top of the cover. Last year I just left it alone, but by spring the water was pretty gross looking and there was so much weight that the cover was sagging significantly in some areas. My neighbor mentioned something about cover pumps, but I'm not sure if I really need one or if it's just another unnecessary pool expense. The water doesn't seem to be going anywhere on its own, and I'm worried about potential damage to the cover or the pool underneath. What's the best approach here?
Quick Answer
You likely need a cover pump if water regularly accumulates on your pool cover after rain or snow. Standing water can damage covers, create safety hazards, and lead to algae growth.
Determining Your Cover Pump Requirements
Wondering why your pool cover is sagging with water or ice this winter? The answer to whether you need a cover pump is simpler than you think. Let me walk you through the essential steps to make this determination and get your system set up properly.
Step 1: Assess Your Current Water Accumulation Pattern
First, observe how water behaves on your specific cover setup. Walk around your pool after the next significant rainfall and note where water collects. Solid covers are most prone to water accumulation, while mesh covers (including mesh safety covers) typically allow water to drain through naturally. Note that safety covers come in both types — a solid safety cover, or a solid cover with a small center drain panel, will still collect standing water after heavy rain. If you consistently see standing water that remains for extended periods after precipitation (typically 24-48 hours, but consult your cover manufacturer's guidelines), you're dealing with a drainage issue that requires intervention.
Document the depth of standing water using a ruler or measuring stick. Water depths exceeding manufacturer recommendations (typically around 2 inches) indicate a need for mechanical removal - consult your cover specifications, as this weight can stress cover materials and anchoring systems beyond their design specifications.
Step 2: Evaluate Safety and Structural Concerns
Standing water creates multiple hazards that extend beyond simple inconvenience. The accumulated weight can cause permanent stretching or tearing of cover materials, particularly at stress points near anchors and springs. More importantly for a safety cover, the added weight strains the seams, anchors, and springs — and a cover sagging under standing water is unstable, which undermines the very safety function it's designed to provide.
Examine your cover's current condition for signs of stress: sagging areas, loose anchors, or visible stretching of the material. These indicators suggest that water weight is already compromising your cover's integrity.
Step 3: Choose the Appropriate Pump Type
Select your cover pump based on your specific drainage needs and local climate conditions. Automatic pumps feature built-in sensors that activate when water reaches a predetermined level, making them ideal for areas with frequent precipitation. Manual pumps require you to start and stop operation, but offer more control and typically cost less initially.
Consider pumping capacity measured in gallons per hour (GPH). Most residential applications work well with pumps rated between 300-1200 GPH, but verify the appropriate capacity for your specific cover size and manufacturer recommendations.
Step 4: Gather Required Installation Materials
Before beginning installation, assemble all necessary components. You'll need the pump unit itself, appropriate length of discharge hose, and proper electrical connections. Ensure your electrical setup includes GFCI protection as required by electrical codes for outdoor water applications near pools.
Check that your discharge hose can reach an appropriate drainage area away from the pool deck and foundation. The hose should be long enough to direct water to landscaped areas or drainage systems that won't cause erosion or property damage.
Step 5: Position and Connect Your System
Place the pump in the deepest area of water accumulation, typically near the pool's center where covers naturally sag. The pump's intake should sit directly on the cover surface to achieve maximum water removal efficiency.
Route the discharge hose away from high-traffic areas and secure it to prevent disconnection. Never discharge pumped water back toward the pool area or onto walkways where it might create slip hazards or refreeze during cold weather.
Step 6: Test Operation and Adjust Settings
For automatic pumps, test the sensor activation by adding water around the unit until it starts pumping. Verify that the pump stops when water levels drop appropriately. Manual pumps should be tested to ensure proper flow rates and complete water removal capability.
Adjust float switches or sensors according to manufacturer specifications to prevent the pump from running dry, which can damage internal components and void warranties.
Step 7: Establish Ongoing Maintenance Protocols
Create a regular inspection schedule throughout the winter months. Check pump operation after each significant weather event and clear any debris that might obstruct the intake or discharge. Remove and store the pump properly before spring opening to prevent damage from pool chemicals or cleaning procedures.
Monitor electrical connections for corrosion or damage, particularly at GFCI outlets and extension cord junction points. Replace any compromised electrical components immediately to maintain safe operation.
Long-term Benefits and Cost Considerations
While cover pumps represent an additional expense, they typically pay for themselves by extending cover life and preventing costly repairs. Covers that remain free of standing water last significantly longer and maintain their protective properties more effectively.
The investment also provides peace of mind during extended periods away from home, knowing that your pool cover won't be compromised by unexpected weather conditions or seasonal precipitation patterns.
Always consult your pool cover manufacturer's specifications and local electrical codes. For complex installations or electrical work, consider consulting a pool professional or qualified electrician.
Still need help? Ask a Pool & Spa Expert AD
Get a personalized answer from PoolGuy810 — 30 years owning a pool and spa repair company. Describe your issue and get step-by-step help.
Need More Help?
Try our free pool calculators and tools to help diagnose and fix your pool problems.
Browse Pool ToolsSLAM calculator, pH calculator, salt dosing & more